
Getting the keys to a new place is one of the most exciting moments of homeownership or renting, but before the furniture arrives and the boxes start stacking up, a proper move-in deep clean is needed. The home may look ready, but vacated spaces often carry months of buildup that the previous occupants couldn’t fully reach.
Here’s a guide on how to clean each room and appliance in your new home.
Jump Ahead
A Quick Word on Chemical Safety
Deep cleaning often calls for stronger products than weekly upkeep. The most dangerous error is mixing incompatible household chemicals.
- Never mix bleach with ammonia. Ammonia appears in many glass cleaners and floor strippers, and their combination produces chloramine vapors that cause immediate respiratory distress.
- Never mix bleach with acids. That includes white vinegar and most toilet bowl cleaners. The reaction releases chlorine gas, which can cause severe chemical burns to the airways.
When in doubt, finish with one product, ventilate the room, and only then move on to the next. Equip yourself with the basics: chemical-splash goggles, nitrile gloves, and an N95 mask for dusty or fume-heavy work, such as cleaning the oven.
The Kitchen
Kitchens are the hardest-working rooms in any home, and they collect the most stubborn residues. Tackle them first so cleaning products have time to do the work while you move on to lighter tasks.
The Oven
Skip the self-clean cycle. It bakes residue further into the enamel, filling the home with smoke. A simple, eco-friendly approach works better.
- Mix baking soda with water into a paste.
- Spread it over the interior walls, ceiling, and door glass (avoid the heating elements).
- Let it sit overnight (8 to 12 hours).
- The next day, wipe out the softened residue, then spray a 3:1 water-to-vinegar solution onto any leftover spots.
- Wipe clean with a microfiber cloth.
The Microwave
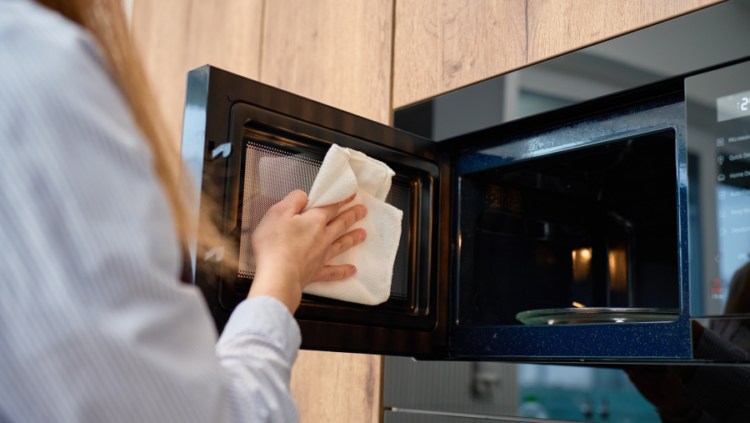
Carbonized food on the ceiling of a microwave is one of the most common signs of a previous tenant in a hurry. The fix is steam.
- Combine 250 mL of water with 2 tablespoons of white vinegar or lemon juice in a microwave-safe bowl.
- Drop in a wooden toothpick. This prevents superheating, where water can erupt violently when the bowl is moved.
- Heat on high for 3 to 5 minutes until it reaches a rolling boil.
- Let it sit for another 2 minutes so the steam condenses on the walls.
- Wipe everything down with a damp cloth.
The Refridgerator
Condenser coils first. These coils, typically positioned behind a front grille, along the back panel, or on top of built-in units, release heat from the system. When they’re caked in dust and pet hair, the compressor works harder, electricity bills climb, and the unit fails earlier. Use a coil brush and a vacuum with a crevice tool to clear them.
Then the gaskets. The rubber door seals tend to trap moisture and crumbs, creating an environment where mold and bacteria can easily grow. Clean them with a soft toothbrush dipped in warm, soapy water, and never bleach.
Finally, the interior. Wipe down all surfaces with 2 tablespoons of baking soda dissolved in a quart of hot water. It sanitizes and absorbs odors without leaving a chemical residue. For lingering smells from spoiled food, leave a shallow pan of activated charcoal inside for 48 hours.
The Dishwasher
Pull out the bottom-rack filter and rinse it under hot water with a scrub brush. Then twist off the spray arms and soak them in hot vinegar to dissolve mineral scale. Use a toothpick to clear each spray nozzle individually.
The Range Hood
Mesh grease filters can be soaked for 15 minutes in boiling water with dish soap and baking soda. If your hood is ductless, it likely has a charcoal filter that can’t be cleaned and should be replaced every three to four months.
Laundry Appliances
The laundry room is where deep cleaning crosses into fire prevention.
The Dryer
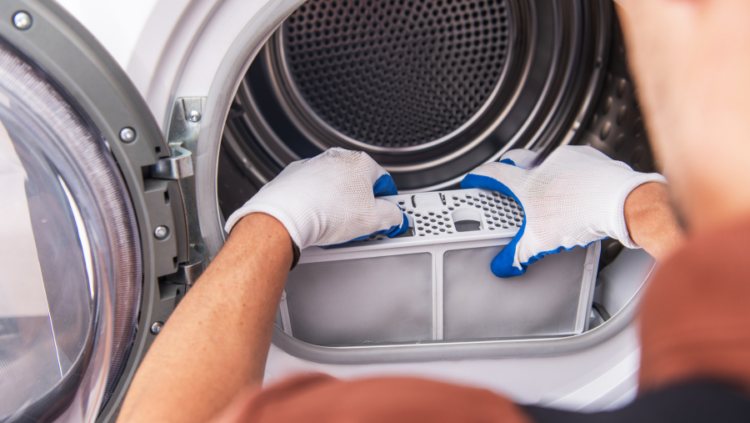
Lint accumulation in the dryer’s exhaust duct is one of the leading causes of residential fires. A move-in is the ideal time to clear the entire 4-inch path from the back of the dryer to the exterior vent. Specialized brush kits and vacuum attachments make this more manageable.
While you’re back there, wipe the moisture sensor strips inside the drum with rubbing alcohol. Dryer-sheet residue builds up on these strips and “blinds” the sensor, leading to clothes that come out either damp or over-dried.
The Washer
High-efficiency front-loaders are particularly prone to a waxy buildup called “scrud”. To remediate:
- Pull out the detergent dispenser drawer and soak it in hot, soapy water.
- Run a hot wash cycle with 2 cups of white vinegar to break down the buildup.
- Run a second cycle with ½ cup of baking soda to neutralize odors.
- Wipe the door gasket carefully. Pull back the rubber folds and check for hidden mildew.
Walls, Floors, and the Air You’ll Breathe
The rule here is top-to-bottom: anything you knock loose at a higher elevation will land on a surface you’ve already cleaned below.
High-Elevation Surfaces
- Ceiling fans: Wipe each blade with a microfiber cloth, then vacuum the motor housing.
- Air return grilles: Vacuum or remove and wash. A clean grille extends the life of your HVAC system.
- Bathroom and laundry exhaust fans: Take off the cover and clean the dust off the blades. These fans manage moisture, and a clogged one is an open invitation for mold.
- Light fixtures: Remove globes and shades, wash them, and dust the heat-dissipation vents
High-Touch Points
Doorknobs, light switches, cabinet pulls, faucet handles, and thermostats see the most contact and the least cleaning. Treat each one with an EPA-registered disinfectant.
Baseboards, Window Sills, and Door Frames
Use a pH-neutral cleaner. Anything too acidic or alkaline can damage paint and wood finishes. A microfiber cloth catches dust without scratching.
Garbage Disposal
Drop in 2 cups of ice and 1 cup of rock salt, then run the disposal. Follow with a hot-water flush.
Finishing Touches
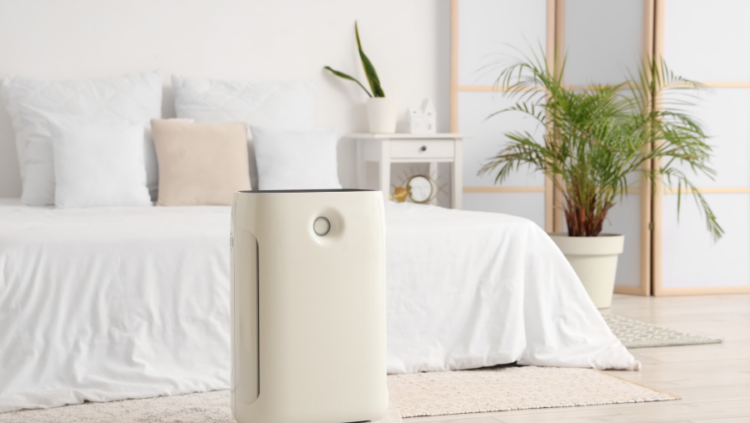
Once everything is wiped down, run an air purifier with a HEPA filter for a few hours to capture lingering dust and VOCs from cleaning products. Vacuum all carpets thoroughly and disinfect hard floors. Make sure every floor is completely dry before placing furniture.
A Fresh Start, the Right Way
A thorough move-in deep clean is one of the best investments of time you can make in a new home. By combining safe chemical practices, appliance maintenance, and structured cleaning techniques, you create a healthier living environment from day one.
Looking for a home worth deep-cleaning? Start your search on Zoocasa and find the right fit for your next move.