If your furniture feels outdated or no longer matches your style, a simple makeover can bring it back to life. Oftentimes, a fresh coat of paint is all you need to completely transform its look, saving you the expense of purchasing new furniture. With a little time and effort, you can turn it into a piece you love again, and it doesn’t have to be difficult.
Not sure how to paint furniture? We’ve got you covered! Here are five simple steps for painting furniture to achieve a long-lasting makeover.
Materials
- Soft Cloth
- Oil Soap
- Medium-Grit Sandpaper
- Fine-Grit Sandpaper
- Tack Cloth
- Paint
- Synthetic Paintbrush
- Foam Brush
- Foam Roller
- Top Coat
Step 1: Clean & Rinse
The first step before painting is to thoroughly wipe down all the surfaces of your furniture. Ensure that you remove any dust, dirt, or grease, as paint will not adhere properly to a dirty surface. You can use regular dish soap and a soft cloth for the cleaning process, or opt for oil soap, which is specifically made for cleaning wood. After wiping, rinse off any residue and dry the surface.
Step 2: Sand & Prime
A crucial step to take before painting is to sand and prime the surfaces of your furniture. Use a medium-grit sandpaper on each side to remove the glossy finish. This creates a slightly rough texture that allows the new layer of paint to adhere properly. After sanding, wipe away all the dust with a tack cloth to ensure a smooth, even application. Once the surface is clean, apply a primer to seal the surface and provide a solid base for the new paint.
Step 3: Choosing Furniture Paint vs. Latex Paint
There are two main types of paint to consider: furniture paint and latex paint. Furniture paint is specially formulated for furniture, providing excellent coverage and strong adhesion. Latex paint is water-based and typically used for walls, but it can also be used on furniture if the surface is properly prepped. It dries quickly and is usually more affordable, but it may not be as durable as furniture paint.
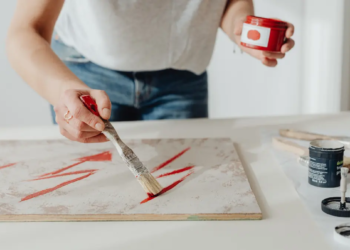
Step 4: Painting
Start applying an even coat of paint to all surfaces using a foam roller or a synthetic paintbrush. Usually, two coats of paint are enough, but depending on the original color of the furniture and the new color, you may need four to five coats, especially if you’re painting a light color over a dark one. Be sure to follow the drying times recommended on your paint can before applying the next layer. For the smoothest finish, it’s a good idea to lightly sand the surface with fine-grit sandpaper between each new coat.
Step 5: Seal and Protect
Before sealing with a topcoat, make sure the paint has reached the minimum drying time recommended on the can to prevent peeling. There are three types of topcoat finishes: flat, satin, and gloss. Satin is beginner-friendly as it hides small imperfections while still giving the surface a soft, shiny appearance. Apply the topcoat with a foam brush; keep the strokes close together. Allow the first coat to dry before applying the second coat. Use two to three coats for the best protection.
Step 6: Drying vs. Curing
Once you’re done with painting and sealing, wait for the recommended drying time on the can before touching the surface. Even if the paint feels dry to the touch, the layer underneath may still be soft. Curing is when all the layers of paint have fully hardened and bonded, which can take up to 72 hours, depending on the type of paint. Be careful not to scrub or apply heavy pressure during this time, as the surface can be easily damaged.
Enjoy New and Refreshed Furniture
Painting furniture is a fun way to get creative while saving money and giving old pieces a new look. It lets you add your personal style to your home and transform furniture that feels outdated into something you truly love again. It’s a great DIY project that’s not only rewarding but also enjoyable.
Looking for your dream home? Explore our listings today!